

As a supplier of PP Sheet Extrusion Lines, I'm often asked about the installation process of these highly specialized machines. In this blog post, I'll walk you through the step - by - step installation process of a PP sheet extrusion line, highlighting key points and considerations along the way.
1. Site Preparation
Before the actual installation of the PP sheet extrusion line begins, proper site preparation is crucial. The first step is to select an appropriate location. The area should be large enough to accommodate the entire extrusion line, including the extruder, die, cooling system, haul - off unit, and cutting device. A general rule of thumb is to ensure that there is at least a 1 - 2 meter clearance around the equipment for easy access during operation, maintenance, and potential future expansions.
The floor of the installation site must be flat and capable of supporting the weight of the equipment. The extrusion line can be quite heavy, especially the extruder and the large cooling rollers. In some cases, a reinforced concrete floor may be required. Additionally, the site should have proper ventilation to remove any fumes or odors generated during the extrusion process. Adequate lighting is also essential for operators to monitor the equipment effectively.
2. Equipment Unloading and Inspection
Once the PP sheet extrusion line arrives at the installation site, the next step is to unload the equipment carefully. Use appropriate lifting equipment such as cranes or forklifts to move the components from the transport vehicle to the designated installation area. During the unloading process, it's important to handle the equipment gently to avoid any damage.
After unloading, conduct a thorough inspection of all the components. Check for any visible signs of damage during transit, such as dents, scratches, or loose parts. Compare the received components with the packing list to ensure that nothing is missing. If any damage or missing items are found, contact the shipping company and our customer service team immediately to resolve the issue.
3. Assembly of the Extrusion Line
Extruder Installation
The extruder is the heart of the PP sheet extrusion line. First, position the extruder on the pre - prepared foundation. Make sure it is leveled using a spirit level. The extruder should be firmly fixed to the foundation to prevent vibrations during operation, which could affect the quality of the extruded sheets. Connect the extruder to the power supply, following all the electrical safety regulations. The power supply should be stable and have the appropriate voltage and current capacity as specified in the equipment manual.
Die Installation
The die is responsible for shaping the molten PP material into a sheet. Install the die at the end of the extruder. Ensure that the die is properly aligned with the extruder's barrel to avoid any uneven flow of the molten plastic. Use precision alignment tools to achieve accurate alignment. Connect the die to the temperature control system, which is crucial for maintaining the correct temperature of the die to ensure consistent sheet thickness and quality.
Cooling System Setup
The cooling system is essential for solidifying the extruded PP sheet. Install the cooling rollers or chillers in the correct position after the die. The cooling rollers should be parallel to each other and have a smooth surface to ensure uniform cooling of the sheet. Connect the cooling system to the water supply and drainage system. The water flow rate and temperature should be adjusted according to the requirements of the extrusion process.
Haul - off Unit and Cutting Device Installation
The haul - off unit is used to pull the extruded sheet at a constant speed. Install it after the cooling system. Make sure the haul - off unit's rollers are properly aligned with the cooling rollers to ensure smooth movement of the sheet. The cutting device, which can be a rotary cutter or a guillotine cutter, is installed at the end of the line. Adjust the cutting device to cut the sheets to the desired length accurately.
4. Electrical and Pneumatic Connections
Proper electrical and pneumatic connections are vital for the safe and efficient operation of the PP sheet extrusion line. For electrical connections, follow the wiring diagram provided in the equipment manual. Use high - quality electrical cables and connectors to ensure reliable power supply and signal transmission. All electrical components should be grounded to prevent electrical shocks.
The pneumatic system, if applicable, is used for functions such as clamping, lifting, or actuating certain parts of the equipment. Connect the pneumatic hoses to the appropriate valves and cylinders. Check for any air leaks using a soapy water solution. If a leak is detected, tighten the connections or replace the faulty seals.
5. Commissioning and Testing
After the installation and connection of all the components, it's time for commissioning and testing. First, perform a dry run of the equipment without any PP material. Check the operation of all the motors, sensors, and control systems. Ensure that all the moving parts are rotating smoothly and that there are no abnormal noises.
Next, start the extrusion process with a small amount of PP material. Monitor the temperature, pressure, and speed of the extruder. Adjust these parameters to achieve the desired sheet thickness and quality. Observe the appearance of the extruded sheet, checking for any defects such as bubbles, streaks, or uneven thickness. Make any necessary adjustments to the equipment settings, such as the die gap, cooling water temperature, or haul - off speed.
6. Operator Training
Once the PP sheet extrusion line is up and running smoothly, provide comprehensive training to the operators. Our experienced technicians will train the operators on how to operate the equipment safely and efficiently. The training will cover topics such as equipment startup and shutdown procedures, parameter adjustment, maintenance requirements, and troubleshooting.

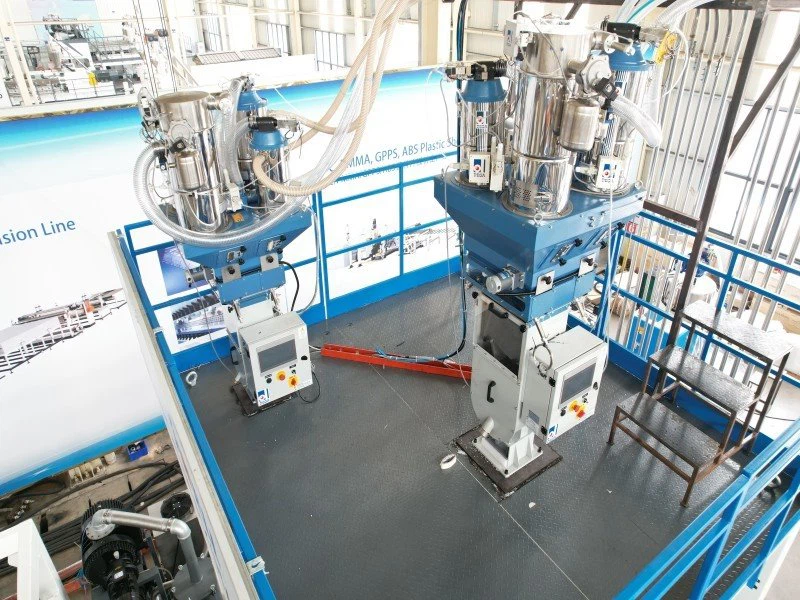
Operators will learn how to monitor the key indicators of the extrusion process, such as temperature, pressure, and sheet thickness. They will also be trained on how to perform routine maintenance tasks, such as cleaning the extruder barrel, changing the filters, and lubricating the moving parts. By the end of the training, operators should be able to operate the PP sheet extrusion line independently and handle common problems.
7. Final Inspection and Handover
After the installation, commissioning, and operator training are completed, conduct a final inspection of the PP sheet extrusion line. Check the overall performance of the equipment, including the quality of the extruded sheets, the stability of the operation, and the functionality of all the components. Ensure that all the safety features are working properly.
Once the final inspection is passed, hand over the equipment to the customer. Provide the customer with all the necessary documentation, such as the equipment manual, maintenance schedule, and warranty information. Our technical support team will be available to provide ongoing assistance and support to ensure the long - term reliable operation of the PP sheet extrusion line.
Conclusion
The installation process of a PP sheet extrusion line is a complex but well - structured procedure. From site preparation to final handover, each step requires careful attention to detail to ensure the successful operation of the equipment. As a leading supplier of PP Sheet Extrusion Lines, we are committed to providing high - quality equipment and professional installation services.
If you are interested in our PS PP Sheet Extrusion Line, PET GAG Sheet Extrusion Machine, or Optical Grade PC PMMA Sheet Extrusion Equipment, or if you have any questions about the installation process or other aspects of our products, please feel free to contact us for further discussion and procurement negotiation.
References
- "Plastics Extrusion Technology Handbook" by Allan A. Griff.
- Equipment manuals of our PP sheet extrusion lines.